Pages

Search This Blog

Showing posts with label Pasta by Hand. Show all posts

Thursday, March 21, 2013

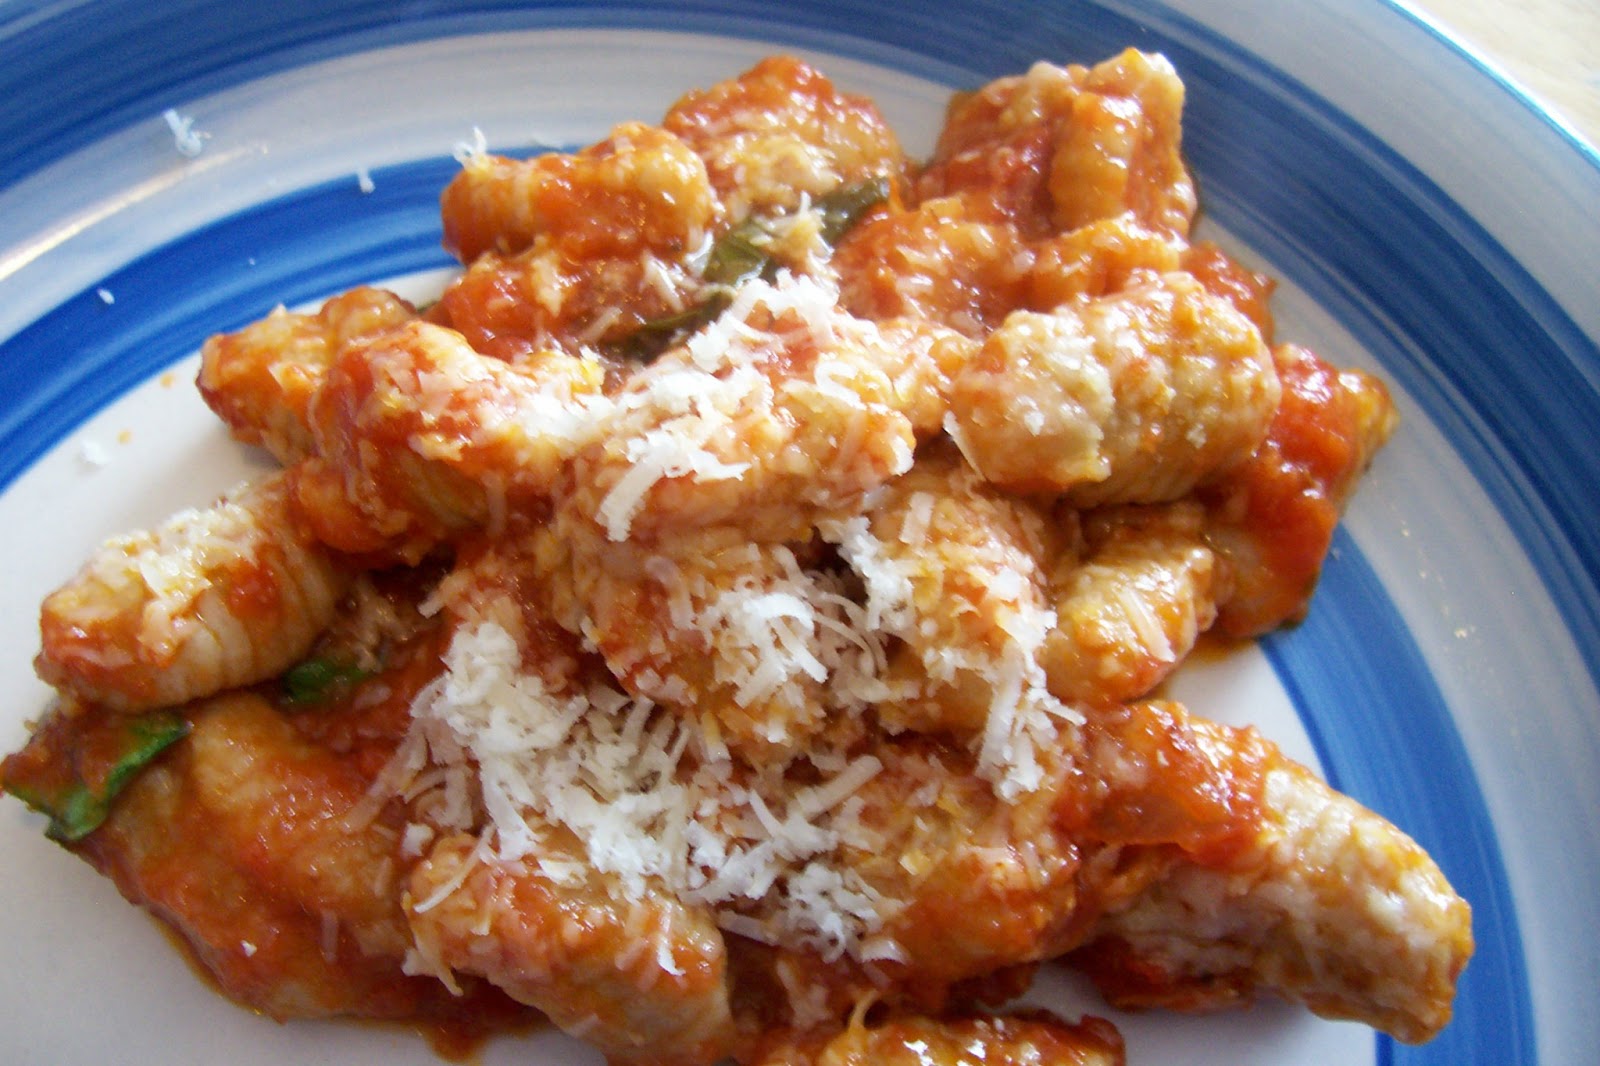
Nonna Caterina's Whole Wheat Gnocchi


I had the honor of having a beautiful Italian woman over for lunch last week and can I just say that I think I have quite possibly met my new best friend! Caterina Maria (Galiazzo) Rilinger is originally from Mason Vicentino, a province in the Veneto region of northern Italy, its capital city is Vincenza. and her Mother comes from Venetian aristocracy which was apparent to me from the moment we met. You see the Venetian woman are modest and elegant a lot like French women but  after only spending a few minutes with them their passionate and flirty ways reveal the Italiana signora  : )  Caterina's family was actually living in Libya when the war (WW II) broke out but she and the other children were sent to North Africa for safe keeping. A few years later while she was there working as a secretary she met a handsome young American soldier named George Rilinger who eventually became the father of her children  and  husband of 56 years! Her husband just passed away a few short weeks ago and she had many tear filled stories to share with us eagerly listening at the table. Two things she shared stood out to me in particular. The first one was a conversation they had their last week together. She asked him if she could French Kiss him in Heaven to which he replied, "I'll have to check with God on that one but if he says it's okay than yes!" She told me that their love was strong and affectionate to the end! The second thing was a bit of advise when asked what was the secret to a happy 56 years of marriage she simply replied, "Never have a headache." What a wise Italian lady : ) It's no wonder that the great writer of old Ange Goudar once said,"The women of Venice are beautiful but, more to the point, they are flirtatious." She also shared about their journey of faith in God and the peace she has that her dear husband is now in Heaven waiting for that possible French Kiss! Caterina is such a Venetian lady a true  romantic through and through and I found myself becoming more of a romantic myself as she spoke of her husband with so lovingly.  And of course as Italians our conversation eventually led to food. She mentioned that her family in Vincenza made their gnocchi with whole wheat flour which I had never heard of so I quickly asked for the recipe and here it is : )


Caterina and George, here you can see Caterina's modest elegance  !


I love this photo of the two of them out on a date!
Here they are after 20 years of marriage still being affectionate :)

A most recent photo of Popop George & Nonna Caterina along with their family: Kaleb and Jenny Holzhauer, Gina,Yvonne, Kiah, and Jessie Zupke.


Nonna Caterina's Whole Wheat Gnocchi
1 large russet potato (or 2 small) per person. This was a great new trick  learned form her!
salt and  black pepper (she said the black specks look nice)
1 egg 
just enough whole wheat flour to form a dough, no measuring!
Directions
Bake the potatoes until soft and cut in half press each half through a ricer (or scoop out and use a masher)
Add the egg and beat in the center.
Add salt and pepper and just enough flour to form a dough do not over flour.
Divide into balls about the size of indoor mini basket balls :)
 Roll each out into a snake about the width of your pointer finger.
cut into 1/2-2/3  inch pieces and roll into gnocchi shape by rolling down a gnocchi paddle or back of a fork.
Freeze on a cookie sheet with parchment until set then place in freezer baggie until ready to use. Or if using right away allow them to dry out on parchment.
When ready to cook them bring a heavily salted large pot of water to boil. 
Add about 1 cup of gnocchi at a time after they start to rise to the top allow them to boil for 1 more minute. Every batch of gnocchi is different so I always cook one by it self to see exact timing for all the other gnocchi.
 Remove with slotted spoon.
Serve:
1) In a pan heat up enough red sauce and butter (as much as a 50/50 ratio try this at least once it is simply to die for) add the gnocchi  and cook together for 2-3 minutes and then sprinkle Parmesan on top!
2) In a casserole dish heat up the red sauce and butter in a 350 oven add the gnocchi and coat then add Parmesan on top and bake for 10 minutes or until cheese melts, this is my favorite way : )
~Here's the gnocchi just before freezing~
Notes on Whole Wheat Gnocchi: I found that the dough was much easier to form, roll out into the snakes, and cut into the pillows then regular gnocchi but it became a bit trickier when time to roll down the paddle. I found it was easier once I added a little more flour to each gnocchi before rolling down the paddle voila!

Wednesday, December 19, 2012

Ricotta Spinaci Gnocchi

The dough is soft but firm enough to shape balls.

My beautiful daughter mixing the dough.

Here she is shaping the gnocchi.


Here is the uncooked gnocchi ready to freeze for Christmas day!

 I am making two different kinds of gnocchi for Christmas Dinner just like my Mom used to make for our special celebratory meals: regular potato gnocchi and spinach and ricotta gnocchi. I will serve the potato gnocchi with a red sauce (cooked with some Italian sausage) and the spinach gnocchi with a butter Parmesan sage sauce yummm I cant wait! This recipe is my Mom's recipe but hers was more like, "Take about 2 packs spinach, an egg, and uhhhm maybe 2 or more cups cheese and enough flour to make it hold shape."  My Mom would always place the boiled gnocchi in a pan with  olive oil and Parmesan cheese and bake a few minutes I am doing this but have also decided to add a little sage and butter for the holidays : )
Ingredients
2 packs frozen spinach (10 ounces each) defrosted and drained very very well
2 cups ricotta cheese
1/2 cup grated Parmesan cheese: a good packed down 1/2 cup (This is my addition to my Mom's recipe.)
1 egg plus 1 egg yolk beaten
about 1 cup or so flour all purpose
1/2 teaspoon salt
a dash of nutmeg
2 tablespoons sage chopped for baking 
butter and olive oil for baking (about 2- 3 tablespoons each)
1/2 cup grated Parmesan cheese for baking
Directions
Chop the spinach very fine.
In a large bowl add the spinach, both cheeses and egg and mix together.
Add the flour starting with 3/4 cup along with the salt and nutmeg and mix by hand. Adding more flour if needed. You want a dough that holds together nicely but not too dry.
Shape into the size of a large gumballs or jaw breakers, that's what my Mom said : )
Now you can freeze these for later use by placing on a cookie sheet until frozen and then placing in a freezer bag. Or proceed to next step I always find that my gnocchi comes out better if I freeze it ahead and this way it never falls apart in the water.
Place some butter and olive oil (50/50) in pan with the sage and put in a 350 oven to melt.
Bring  large pot of water to boil, add gnocchi in bunches (not all at once) and boil for 3-5 minutes after they rise to the top, remove with a slotted spoon and place in the pan of melted butter and olive oil.
Once they are all in the pan add some Parmesan cheese and roll them all over in it to coat, bake for 10-15 minutes until golden brown and starting to crisp!

Friday, January 27, 2012

Homemade Tortellini


Okay so I finally did it........ I made homemade tortellini! I made larger tortelloni for a butter sauce and smaller tortellini for a soup and it was a blast. Okay so I admit I am a food nerd as I do enjoy spending my afternoon making pasta by hand but even I didn't enjoy that part of it the flavor and texture--that toothy bite into a fresh pasta is so very good-- of fresh tortellini was so different from dried or frozen it would have been worth it. And I dare say even if you are not absolutely in love with the taste of fresh pasta the fact that your family will now think you a rock star makes it worth it.... so have I convinced you to try homemade pasta yet? If you want to watch an expert and fellow blogger friend's shape tortellini click HERE!
Ingredients
1 pound homemade Pasta Dough Recipe
1 cup filling: Meat Filling. Cheese Filling, Squash or Potato Filling, be creative just remember to add nutmeg as that is traditional. See the Gorgonzola & Potato filling I made for these below.
Sauce or Broth (You can eat tortellini in a soup broth with some Parmesan cheese topping or in a creamy butter sauce like you do ravioli.)
Directions
Make your dough and separate into three pieces. Set up your pasta rolling machine and roll through each number starting with 1 two times ending with number 5.

Now cut your sheet into circles or squares:
 For big tortelloni: cut into 4 inch circles or squares
For small tortellini cut into 2 inch circles or squares
Keep this in mind: The larger tortelloni like ravioli are usually served with a sauce and the smaller are always served in a soup but not always....... so it's really  up to you!
Place a small pieces of dough in the center of each square or circle and dab edges with a small amount of water.

Fold over into triangle for the squares or a half moon for the circles and press to seal.

Now  turn over and gather corners and press together OR you can just leave it right side up and gather corners to seal. Your preference.

Place on a lightly floured lint free kitchen towel or pillow case and cover with another towel to dry for an hour.
Use after the hour or place in a sealed plastic container between sheets of wax paper and place in fridge to keep for later use for up to a day/over night.
Boil straight in the broth for 3-4 minutes and serve right away or boil in salted water for 3-4 minutes and serve with butter sauce and cheese! The larger tortelloni takes 1 minute or 2 longer.
Gorgonzola & Potato Filling
1large russet potato peeled & cut and boiled until fork tender
1/4 cup grated Gorgonzola cheese
1/8 cup grated Parmesan
fresh grated nutmeg: I like several good grates lot of this
salt and pepper to taste
1/2 Tablespoon melted butter
1/2 Tablespoon olive oil
Mash or Rice the potatoes, add the rest and stir to combine.
~Old Italian Proverb~
In Italian: "Il primo tortellino non riesce mai perfetto."


In English: "The first tortellino is never perfect."

Tuesday, January 10, 2012

Homemade Pasta


 My Mom used to make homemade pasta mostly in the winter months feeling as if she was holed up in the house anyway, she was a true believer in making the proverbial lemonade from lemons. I remember seeing the racks of tagliatelle all over the kitchen as they dried and how it gave me such a homey good feeling. These racks which were actually clothes drying racks were only used for this purpose and so I thought they were genuinely called pasta drying racks until adulthood. Now as an adult I have my own authentic pasta drying rack and I try replicate this homey feeling every winter in my own ~home sweet home~ This recipe is for a general all purpose pasta dough used for everything from spaghetti to ravioli it is based on my Mom's recipe but that has been tweaked a bit over the years.
~My Mom and me in the cucina, our favorite place still to this day~

Ingredients 1 pound
2 cups flour: bread, all purpose, or semolina  (See my note below)
1 teaspoon sea salt
2 large eggs, beaten
1 egg yolk
1 tablespoon olive oil
water as needed
Flour Note: I have always used all purpose or half all purpose half semolina to save money while My Mom typically used semolina only and then I saw in The Silver Spoon to use bread flour, I tried it and it was much more tender like semolina flour but it must rest for an hour before rolling out.
Directions
Kitchen Aid
Place dry ingredients in KA mixer and aerate. Add wet ingredients and knead for 7 minutes. Add some water or flour if needed: some days this recipe is just perfect but other days I may need to add more water.Knead on floured counter for a minute.
Separate in to *4 portions and place each in a plastic bag so they won't dry out while you are rolling.
Cuisinart
Place dry ingredients in machine and aerate. Add wet ingredients slowly and allow to form a mass and then knead this mass for just under a minute. Add some water if needed: some days this recipe is just perfect but other days I may need to add more water. Knead on floured counter for 1 minute. Separate in to 4 portions and place in plastic bag. Allow to rest for 30 minutes  or an hour if using bread flour.

Now we are ready to run them through the pasta machine!!
Start by shaping the dough into a flattish oval with your hands and running it through the widest setting (number 1) about 5-10 times! If it tears no worries just fold over and do it again. Each time fold it half again trying to keep a rectangle shape. This is kneading the dough and you do this until the dough is soft. Now sprinkle more flour on each side.
Now we are ready to thin it out. We are going to run it through each number one time. Starting at number 2 and working your way up to about 6 or even up to 9 for really thin but if just starting out you can stop at 6 and work your way up as you become more comfortable with making pasta. Do not push or pull just guide. If it gets too big cut in half. Or you can use a large wooden dowel or handle to catch it as it comes out and gets longer, my Mom taught me this trick! Or better yet, get an extra set of hands : ) Now you are ready to make some pasta shapes!


Shaping Our Dough
Now you can make tagliatelle or fettuccini (These are the wider flat pastas) by using the attachment for your machine. Simply run it through on the last number you used to thin out the dough and voila! 
Or you can do this by hand. Flour your dough well on both sides and then roll up loosely. Now cut into strips and then pick up and toss to separate.
  • To Make Lasagna noodles just cut the piece of dough into about 13 inch long pieces after the last rolling through number 5-6. You need to quickly boil approximately 2 sheets at a time, 2-3 minutes. Place them on a table cloth to rest before using.
  • To Make Ravioli go here: Ravioli
  • To make Canneloni roll out to a rectangular sheet on number 5-6. around 13 inches long then boil 2-3 at a time for 2-3 minutes and set on clothe to dry. Cut each in half and place stuffing near one end and roll up. 
  • My daughter in-law and I are working on making tortellini so that will be coming soon! 
What If The Strands Stick and Do Not Separate? 
This is a common problem it usually due to too sticky of a dough, add more flour to the machine and dough before pressing through to make the tagliatelle shape. But sometimes it just happens----maybe the weather that day or the type of flour you used--- and you just may have to separate the strands.

Using & Storing the Pasta
Drying Before Cooking Same Day- Hang on rack or flat on a floured sheet pan across table and allow to dry for atleast half an hour before cooking.
Drying Before Storing- To store the pasta it must be completely dry or else it will mold. The time varies depending on thickness of pasta, humidity, and temperature of kitchen it may take hours or even up to days. Once it is completely dry place the dried pasta in a large Ziploc baggy and lay flat or use a plastic container, I feel that a plastic container that is wide and flat works best.
Freezing- Lay each pasta out on sheet pan and freeze for 1/2 hour. Place in a large baggy and freeze flat down for up to several months if sealed well.
Cooking Time – Fresh 3 minutes OR Frozen or Dried 5 –7 (al dente - bite it and it should be firm to the tooth yet tender)
This is my daughter in-law's first homemade tagliatelle!

What Sauce To Use For Tagliatelle/Fettuccine?-  These pastas are delicate and quite tasty since they are fresh so I do not like anything too acidic as it takes away from the pasta flavor so I like to use a Butter based sauce such as my: Butter Tomato Sauce Recipe  Wiki says: "Traditionally tagliatelle is homemade and used for thick sauces, generally made with beef, veal, or pork, and occasionally with rabbit, as well as several other less rich (and more vegetarian) options; such as briciole e noci (with breadcrumbs and nuts), uovo e formaggio (with eggs and cheese - a less rich carbonara), or simply pomodoro e basilico (with tomatoes and basil)." Information Source: Wiki

*Note- My friend Katherine has suggested cutting the pasta pieces into 6 loaves  in order to handle it if you do not have an extra set of hands!

Tuesday, January 3, 2012

Ravioli di Ribellione (Rebellious Ravioli)


I am getting a bit annoyed with all those Post Holiday ads and commercials telling me to diet, it just makes me want to...well not diet! So in  a very rebellious mood I decided to make some homemade ravioli with my left over Christmas Pork Roast....and I will say it tasted extra good knowing I was not doing what I was told ; ) While I  stuffed my ravioli I couldn't help but feeling a little like a teenager back in the eighties again singing that anthem of rebellion all of us knew too well, "Where not gonna take it anymore, just you try and make us!" Yes you guessed it......Twisted Sister's We're Not Gonna Take it! So there you go you dieters because We got the right to choose it and I wanna eat!
That's me in the eighties! I had green eye-make- up to match my Catholic School Uniform unfortunately I think I kind of looked a little like Twisted Sister..yikes!

Ingredients
(Serves 6 heartily)

1 recipe for 1 pound of Pasta Dough
left over pork roast or any other meat you have seasoned and roasted (about 2 cups after processing)
1/4 cup Italian bread crumbs
1/2 cup Parmesan cheese grated
a few scrapes of fresh nutmeg
1 recipe Red Sauce( you need enough for serving, about 5-6 cups)
1 egg wash for sealing edges ( 1egg mixed w/ 1 T water)
Directions 
In a food processor grind up your meat.
Add bread crumbs & nutmeg stirring to combine.
Saute the meat mixture in a pan with about 2-3 tablespoons heated olive oil for about 10 minutes.
Remove from heat and add the cheese, stir well.

Prepare pasta dough.See these 2 recipes for forming, cutting, and filling ravioli:


Now you can either boil the ravioli  after sitting out on a clean towel to dry out a bit for about an hour: bring a large pot of salted water to a boil. Add all the ravioli and stir gently so they don't stick, allow them to come to top then boil for about a minute or until al dente.
Or you can place in fridge covered in a plastic container laying flat in between sheets of wax paper or plastic wrap for later use that same day.
Or freeze for use later on, ravioli freeze nicely.  See how to freeze ravioli HERE, near the bottom of the recipe.

Now you are ready to serve your ravioli with the heated red sauce and a little more Parmesan cheese please : )

Monday, August 29, 2011

Homemade Cavatelli w/ a machine

Frozen Cavatelli ready to be boiled.
 Cavatelli are a lot like gnocchi only they are made with ricotta rather than potato and although we were a gnocchi family growing up I have come to love cavatelli as an adult. This is mainly due to the fact that my wonderful  Mom gave me a Cavatelli Machine for Christmas! I make the dough in a food processor and then flip them out in this little machine in a matter of minutes making homemade cavatelli so simple : )
If I am serving these with a Ragu I serve 6 smaller portions but if I am serving them with a simple Marinara or a Tomato Butter Sauce I serve 4-5 larger portions.

Yummy Cavatelli w/ Marinara sauce!
Ingredients (Serves 4 large portions or 6 smaller)
2 cups of flour
1 egg
8 ounces ricotta cheese
1 teaspoon salt
1/4 - 1/2 cup milk (you will not need all of this)
small grating of nutmeg or pinch of ground nutmeg
Directions
Using the dough or metal blade process the flour, egg, ricotta and salt together, pour the milk by the tablespoon full through the tube and process again until a dough ball forms and then 30 more seconds.Some days I need only a few tablespoon and some days almost the whole amount. Then dump out onto a floured counter top and knead a few times. You do not want a sticky dough. Allow this to rest covered for 15 minutes.
Now roll dough into a large rectangle 1/2 inch thick trimming sides to form a perfect rectangle. Cut the dough into 3/4 inch strips. Now dust each strip with flour on both sides and then run each strip through the machine, that's it! I like yo have some flour on the counter below the machine and I also dust the wooden bars of the machine with flour each time as well. Sometimes if you let them collect in  a pile they stick so be swooshing them aside as you crank them out allowing them to become slightly dusted with the flour on the counter.
I like to freeze my cavatelli to firm it up a bit. I do this by laying on a tray and freezing until firm then placing into a baggie, This will keep for several months!
Cooking & Serving Instructions:
Bring a well salted large pot of water to boil.
Add cavatelli and allow to float to top.
Then boil for 1-2 minutes, you want tender but not mushy.
Remove with a strainer and place in serving bowl.
Add sauce and serve with Parmesan or Romano Cheese.
If you want to make this ahead and serve later you can also bake this by following these instructions for my Gnocchi Al Forno.
 Cavatelli Machine!

The dough is firm enough to roll and not sticky.
Roll out and trim neatly.
Cut into strips, mine are not perfect but oh well!
Crank it through!
I took the scraps and made a finger width roll and it worked, although a tad bit smaller.

Voila!

Friday, March 11, 2011

Homemade Ravioli ( Using a Ravioli Press)


My wonderful husband got me this ravioli press and I am having so much fun with it.  I can literally make 72 (enough to feed 6 hungry people) homemade from scratch ravioli in less than an hour! But if you want to make ravioli the old fashioned way no worries I have a post for that as well: Homemade Ravioli By Hand.
Ingredients
1 Pasta Dough Recipe
Filling of your choice (See my Arugula Filling below!)

Directions
Make your pasta dough and allow to rest in the fridge for 1/2 an hour. Take out and allow to get just a bit warmer.
Divide it into 4 pieces placing the pieces you are not using in the baggy set aside to stay moist.Save all of the scraps in the baggy in between batches as these will make 2 more pieces of dough for 24 more ravioli.
Now roll out in a pasta roller machine starting with #1 moving up to #5, once for each number.
Place on floured counter and cut in 2 down the middle. Roll out until it will fit the mold.
Place the bottom piece on the mold and fill, just about 1/2 teaspoon, if you use too much they will burst while boiling.
Place the top piece of dough on and press in slightly.
Remove the plastic piece and set aside.
Now flour your rolling pin and roll~ roll~ roll across and side ways until it is totally pressed in. Remove the scraps and place in baggy you will need these: they will equal another piece of dough for the final 12 ravioli so save them!
Now flip out (You may need to slightly coax them) onto a floured wax paper covered sheet pan. Allow these to dry out slightly before boiling or freeze straight on the pan and then place in a baggy once they are frozen.
At the end take all of the scarps and knead together and cut in two pieces.
Now use these to make two more trays of ravioli. If it is too tough place it in the baggy and allow to rest a few minutes. I find that this final batch is tougher to roll through the machine but cook up just as tender.

~Homemade Ravioli Tutorial~

Ravioli Press/Mold


Divide dough into 4
Roll out to #5 on a pasta machine or as thin as you can by hand
Cut into 2 and place 1 sheet on metal ravioli  mold
Place a demitasse spoonful of filling in each circle
Place the second sheet on top
Lightly press the plastic piece on top and then remove
Roll all over with a rolling pin to seal and cut
Dump out on to a parchment covered pan
Arugula Ravioli Filling
Ingredients
1 egg
3/4 cup ricotta whole milk
1/4 cup Parmesan grated
 a few scrapes fresh nutmeg or small pinch of nutmeg
1/2 cup arugula
pinch of salt
Directions
Process the arugula in a food processor until fine. Add the other ingredients and pulse until mixed. Or chop arugula finely by hand and then mix in other ingredients until well combined. Taste for salt and add more if needed.

Wednesday, January 12, 2011

Homemade Gnocchi w/ Gnocchi Paddle


My Mom gave me the greatest Foodie gift for Christmas this year, a gnocchi paddle! I am having so much fun with it so far so thought I would post some pictures. It was so much faster than the traditional fork or grater method. You just have to make sure to flour the gnocchi and paddle well, I had to re- flour with each new "snake" of dough I used and sometimes I had to clean out the paddle grooves by using the back of a butter knife so that I would not cut into the wood. If you don't have a paddle you can order one ($3.99!) by clicking on the link above.
Mangia Mangia  Homemade Gnocchi!
Here is my Gnocchi Recipe with pictures!
Here is a  Quicker & Easier Gnocchi Recipe!